If you’re asking why does my homemade pizza crust never get crispy, I feel your pain. For years, my homemade pizzas came out with pale, floppy crusts that folded under the weight of the cheese — more like a sad flatbread than the blistered, crackly pies I was dreaming of. The breakthrough came when I realized my home kitchen was missing the one thing pizzerias have in abundance: brutal, intense heat. But here’s the good news — you can absolutely get a crispy crust at home once you understand what’s actually happening in the oven.
A crispy crust is the result of two things happening fast: moisture escaping from the dough and the outside setting before the inside gets soggy. Professional pizza ovens run at 800–900°F, which does this in about 90 seconds. Your home oven probably tops out around 500–550°F, so you have to be smarter about every other variable — the dough, the surface it bakes on, the sauce, and the bake itself. Let’s fix each one.
Why Does My Homemade Pizza Crust Never Get Crispy? Heat Is the Answer
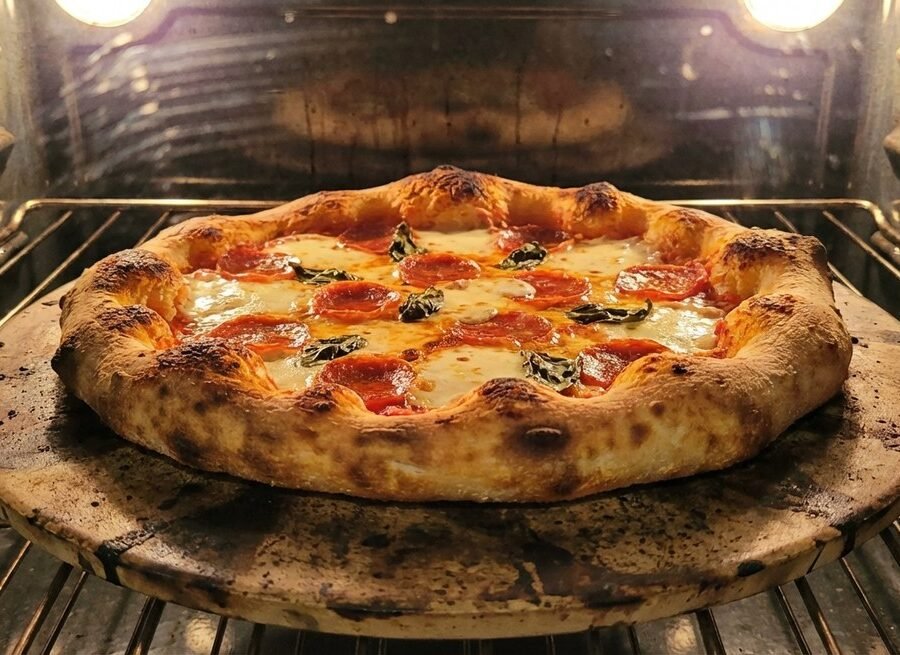
The single biggest upgrade you can make is preheating properly — and I mean really preheating. Most people turn the oven on, wait for the beep, and throw the pizza in. That’s not enough. You need to preheat your oven at its absolute maximum temperature for a full 45–60 minutes with your baking surface inside. This saturates your pizza stone or steel with heat so that when the dough hits it, the bottom starts crisping instantly instead of slowly warming up.
Speaking of baking surfaces: a pizza steel beats a pizza stone for home ovens, in my experience. Steel conducts heat far more efficiently than stone, which means more thermal punch transferred to your crust in the same amount of time. A good steel runs $70–$100 and lasts forever. If you already own a stone, use it — just preheat it thoroughly. And whatever you do, stop baking pizza on a cold sheet pan. That’s practically a guarantee of a soft, steamy crust.
Position matters too. Bake on the lowest oven rack or even directly on the oven floor (if your oven allows it) to maximize bottom heat. Some people finish with 30 seconds under the broiler for leopard-spotted tops. Just watch it like a hawk — broiler goes from perfect to charcoal in under a minute.
Dough Hydration: Finding Your Sweet Spot
Hydration percentage sounds technical, but it’s just the weight of water divided by the weight of flour, and it’s the variable that separates crispy from soggy more than almost anything else. At 550°F, I find 60–62% hydration ideal for home ovens — the dough is easy to handle, stretches without tearing, and crisps reliably. Push to 65% and above and you’re in Neapolitan territory, which needs 900°F to work; at home temperatures, that extra water just steams the crust from the inside.
If you’re working from a recipe that doesn’t list hydration, you can estimate: 500g flour with 325g water is 65%. For a crispier home-oven pie, drop that water to 300–310g. The dough will feel slightly stiffer and less sticky, which is exactly what you want. Give it a full 24 hours in the fridge if you can — cold fermentation develops flavor and makes the dough easier to stretch thin without springing back. I’ve found that dough fermented for a day or two browns better too, thanks to the sugars the yeast produces during the slow ferment.
Dough and Sauce: Where Crispiness Is Won or Lost
Wet dough makes soft crust. If your dough is over-hydrated or under-floured when shaping, no amount of oven heat will save it. Stretch the dough thin in the center. Thick centers stay doughy because the heat can’t penetrate fast enough. This takes practice — I tore a lot of dough before I got the hang of it — but a thin center with a puffy edge (the cornicione) is the structure you want. Let gravity do the work: drape the dough over your knuckles and rotate, letting it stretch naturally.
Now the sauce, which is where most home pizzas quietly fail. Too much sauce, or sauce that’s too watery, soaks the dough before it can crisp. Use about 1/3 cup of sauce for a 12-inch pizza, spread thin, and leave a border. If you’re using canned tomatoes, drain them first or simmer the sauce down until it’s thick. Same goes for fresh mozzarella — pat it dry with paper towels or use low-moisture mozzarella. Wet cheese is the enemy of crisp.
The crispiness checklist
- Preheat oven at max temp for 45–60 minutes with steel or stone inside
- Use 60–62% hydration dough; stretch thin in the center
- Go light on sauce — 1/3 cup max for a 12-inch pie, and make it thick
- Pat fresh mozzarella dry or use low-moisture cheese
- Bake on the lowest rack; consider a 30-second broiler finish
- Let the pizza rest 2 minutes on a wire rack (not a plate) so steam escapes underneath
That Last Step Everyone Skips
Here’s a small thing that makes a real difference: when the pizza comes out, transfer it to a wire cooling rack for two minutes instead of leaving it on the pan or a plate. A hot pizza sitting on a solid surface traps steam underneath, and that steam softens the crisp bottom you just worked so hard to create. A wire rack lets air circulate and keeps the bottom crackly while the cheese settles.
Don’t overload the toppings either. Every extra topping adds moisture and weight, and it insulates the crust from the heat. Three to four toppings max is my rule. If you love loaded pizzas, pre-cook watery vegetables like mushrooms, peppers, and spinach to drive off their moisture before they go on the pie. Your crust will thank you.
Once you dial in the heat management, you’ll find the same principles apply across your cooking — from making a perfect omelet that doesn’t fall apart to ripening avocados fast for your pizza-night guacamole. For the food science behind browning and crisping, the Maillard reaction article on Wikipedia explains what’s happening at the molecular level when your crust turns golden.
So why does your homemade pizza crust never get crispy? Almost certainly a combination of under-preheating, too-wet dough or sauce, and not enough bottom heat. Fix the heat first — max temp, long preheat, steel or stone, lowest rack — then tighten up the dough and toppings. Do that, and you’ll hear that crackle when you cut a slice. That’s the sound of getting it right.