Curly hair and box dye have a complicated relationship. Curls are drier, more porous, and more fragile than straight hair — which means dye processes faster, damages more easily, and shows mistakes mercilessly. The question “do I need a professional?” has a real answer here, and it’s more nuanced than the internet’s usual “never box-dye curls” absolutism. Some curl coloring is safely DIY; some genuinely needs a colorist. Here’s how to tell which situation you’re in.
Why Curls Are Different (The Structural Reality)
Each bend in a curly strand is a stress point — the cuticle lifts at the curves, making curls naturally more porous. Porous hair absorbs dye faster and unevenly (roots vs. ends take color differently), loses moisture faster, and breaks more easily under chemical stress. Add that curly hair’s spiral structure means natural oils never reach the ends, and you have hair that’s simultaneously dye-hungry and damage-prone. This is why the same box dye that gives a straight-haired friend even color gives a curly-haired DIYer patchy, fried results.
When You Can DIY Safely
DIY is reasonable for:
- Going darker or same-level: deposit-only color (demi-permanent) in a shade close to your natural color. Minimal lift = minimal damage. This covers most gray blending and richness-adding.
- Single-process root touch-ups: touching up regrowth with the same formula, carefully avoiding overlap onto previously colored hair.
- Glosses and toners: demi-permanent glosses add shine and tone with negligible damage — the safest DIY category for curls.
DIY rules for curls: choose demi-permanent over permanent when possible (no ammonia, less cuticle disruption), go one shade lighter than your target (porous curls grab color darker), strand-test (porosity varies even across one head), process for the minimum effective time, and deep-condition immediately after.
When You Genuinely Need a Professional
Book the colorist for:
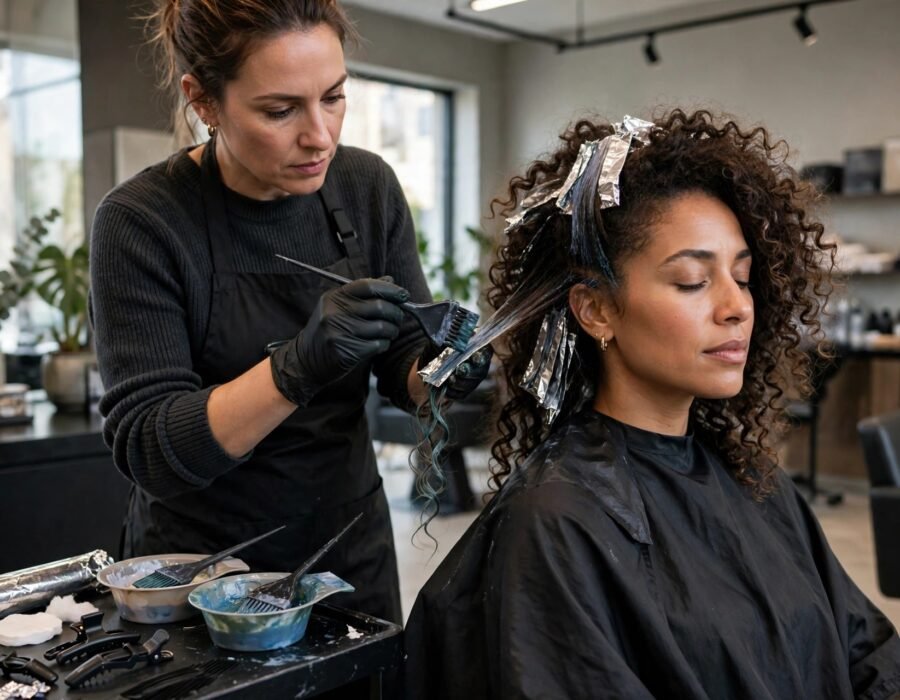
- Going lighter (especially bleach): lightening curly hair is the highest-damage service in color work. Pros control the lift with bond builders, proper sectioning, and timing that accounts for porosity variation. DIY bleach on curls is how people lose their curl pattern — heat/chemical damage can permanently loosen or destroy curl formation.
- Major color corrections: fixing banding, hot roots, or a DIY gone wrong. Corrective color is chemistry; guessing compounds the damage.
- Highlights/balayage on curls: curl-by-curl placement matters enormously — highlights must follow the curl pattern to look natural when worn curly. This is artistry, not application.
- Resistant gray on curly hair: the combination of resistant cuticle + porous curl needs professional pre-softening and formulation.
- Allergies or scalp conditions: PPD allergies, eczema, psoriasis — a pro can do proper allergy testing and gentler alternatives.
Finding a Curl-Competent Colorist
Not every colorist understands curls. Look for: a portfolio showing curly clients (not just straight hair), specific curl cutting/coloring training (Deva, Rezo, Ouidad certifications signal investment), and a consultation where they ask about your curl pattern, porosity, and routine before quoting. Ask directly: “how do you adjust formulation for high-porosity curls?” A good answer mentions lower volume developer, bond builders, and porosity-equalizing pre-treatments. The AAD’s hair care guidance covers the fundamentals your colorist should respect.
The Cost Math
DIY: $10–$30 per application. Professional curl color: $120–$350+ depending on service and market. The expensive middle ground that works for many: pro for major changes and corrections, DIY demi-permanent for maintenance between visits. A $200 balayage maintained with $15 glosses lasts 4–6 months — the blended annual cost beats quarterly full services.
Protecting Curls Through Any Color Service
Whether DIY or pro: pre-treat with a deep conditioner 2–3 days before (not the day of — product buildup blocks dye), insist on bond builders for any lightening, deep-condition after, switch to sulfate-free cleansing, and expect to increase moisture treatments for 4–6 weeks post-color. Color-treated curls need more of everything: more moisture, more protein balance, more gentle handling. Watch for the warning signs of over-processing: curls that won’t spring back when wet, a sudden texture change, or breakage at the crown.
The FDA Safety Note
Hair dyes are regulated as cosmetics in the US, and coal-tar hair dyes carry specific labeling requirements. Always do the 48-hour skin allergy (patch) test before any dye — PPD (p-phenylenediamine) allergies can develop suddenly even after years of uneventful coloring, and reactions range from itching to severe swelling. The FDA’s hair dye safety page details what to watch for.
DIY Curl Color: The Safest At-Home Techniques
If you’re coloring curls at home, these are the lowest-risk approaches. 1. Demi-permanent gloss: the safest DIY category — no ammonia, minimal cuticle disruption, adds tone and shine. Apply to damp hair for even more gentle processing, leave 15–20 minutes. 2. Root touch-up only: when covering regrowth, apply color to the new growth only, keeping it off previously colored lengths — overlap is where damage and banding happen. Use a tint brush for precision, not the bottle applicator. 3. The “curly girl” sectioning method: work in small sections following your curl clumps rather than arbitrary quadrants — this keeps application even across varying porosity and prevents the patchiness that comes from rushing. 4. Porosity prep: do a protein-moisture assessment first (see the float test) — high-porosity sections grab color darker and faster, so apply to resistant areas first and porous ends last, or dilute color with conditioner on the most porous sections. 5. Post-color curl rehab: deep condition immediately, then follow with a protein treatment 3–5 days later (color processing depletes protein), and lay off heat entirely for two weeks. The golden rule of DIY curl color: you can always go darker or add more tone next time, but you can’t undo over-processing — when in doubt, under-process and assess. Strand-test on shed hair from your brush to preview results without commitment.
Conclusion
You don’t always need a professional to dye curly hair — deposit-only color, root touch-ups, and glosses are safely DIY with curl-adjusted technique. But lightening, corrections, curl-pattern highlights, and resistant gray genuinely need a curl-competent colorist, because the damage risk to curl structure is real and sometimes irreversible. The hybrid approach (pro for big moves, DIY for maintenance) gives most curlies the best balance of safety, results, and cost. Keep the broader hair-health picture in view — understanding shedding vs. breakage helps you monitor what color is doing to your hair, and colors that flatter you guide shade choices worth the investment.
Frequently Asked Questions
Can I box dye my curly hair at home?
For going darker or same-level with demi-permanent color, yes — with curl adjustments (lighter shade choice, strand test, minimum processing time). For bleaching or major changes, see a curl-experienced colorist.
Why does hair dye damage curly hair more?
Curls are naturally more porous (cuticle lifts at each bend), so they absorb dye faster and unevenly, and the chemical stress hits already-fragile stress points harder. Porosity also means color grabs darker than expected.
Will bleaching ruin my curl pattern?
It can. Severe chemical damage disrupts the protein structure that forms curls, permanently loosening or straightening sections. Professional application with bond builders minimizes (not eliminates) this risk.
How do I find a colorist who understands curly hair?
Look for curl-specific training certifications, a portfolio of curly clients, and a thorough consultation. Ask how they adjust formulation for porosity — the answer reveals expertise.
Do I need an allergy test before hair dye?
Yes — a 48-hour skin patch test before every new dye product. PPD allergies can develop suddenly after years of safe use, and reactions can be severe. The FDA recommends testing with each application of oxidative dyes.
Sources: AAD hair care and FDA hair dye safety.