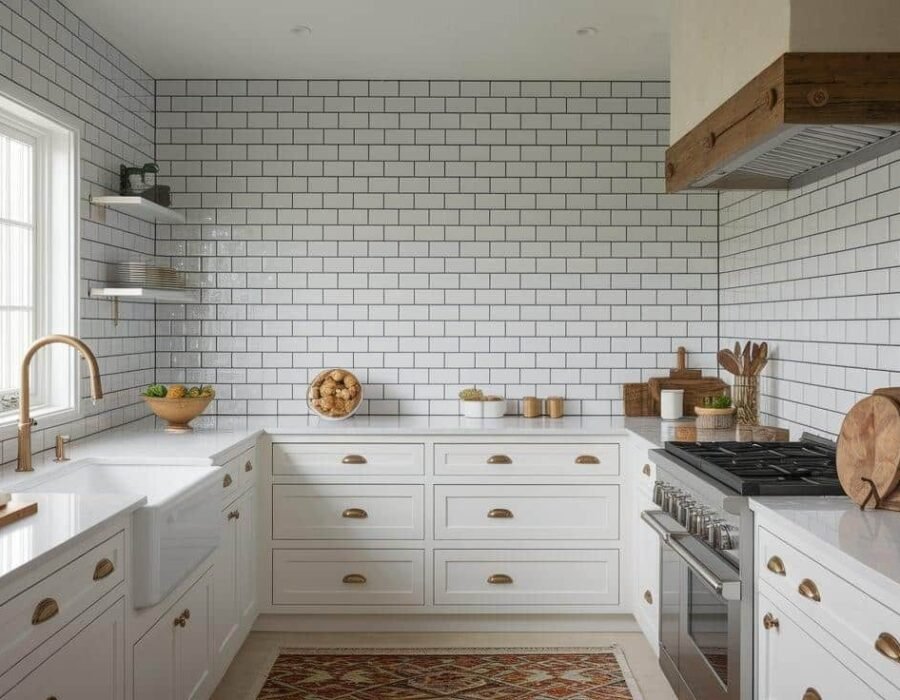
A backsplash is the highest-impact weekend project in the kitchen — and the question how do I install a backsplash in my kitchen myself is one of the most approachable DIY tiles jobs there is. Small area, no floor traffic, very forgiving. I’ve tiled four backsplashes (subway tile twice, mosaic once, large format once), and each took a weekend. Here’s the complete process, including the mistakes to avoid.
Why it’s beginner-friendly: the area is small (typically 20-30 sq ft), it’s at eye level (comfortable working height), mistakes are less visible than floor tile, and if you really botch a section, it’s cheap to redo. This is the ideal first tiling project.
How Do I Install a Backsplash in My Kitchen Myself? Plan First
Choose your tile
- Subway tile (3×6): the classic. Timeless, cheap ($2-5/sq ft), forgiving of imperfect walls. My top recommendation for first-timers.
- Mosaic sheets: mesh-mounted small tiles. Easiest to install (the mesh handles spacing), great for curves/outlets. $5-15/sq ft.
- Large format (12×24+): modern look, fewer grout lines, but heavy and shows wall imperfections. Intermediate difficulty.
- Peel-and-stick: not real tile, but the $100-200 budget option. Looks decent for 2-3 years. Fine for rentals.
- Natural stone: beautiful, needs sealing, variable thickness complicates installation. Save for project #2.
Measure and buy
Measure the area (length × height), subtract nothing for outlets (you’ll cut around them), add 15% for waste/cuts (20% for diagonal patterns). Buy all tile from the same dye lot. You’ll also need: thinset mortar ($20/bag — white for light tile, gray for dark), grout ($15-25, unsanded for joints under 1/8″, sanded for wider), tile spacers, and sealer if using stone.
Tools
- Tile saw (wet saw): rent for $50-70/day — don’t buy for one project. Or a snap cutter ($30-50) for straight cuts on subway tile + tile nippers ($15) for curves/outlet notches.
- Notched trowel (size per tile — 3/16″ V-notch for most backsplash tile)
- 4-foot level, tape measure, pencil
- Grout float, grout sponge, bucket
- Tile spacers (1/16″ or 1/8″)
Prep: The Step That Determines Success
- Turn off power to outlets in the work area. Remove outlet covers; you’ll tile around the boxes and use box extenders later.
- Clean the wall thoroughly — degrease with TSP substitute. Thinset bonds to clean drywall/paint; it doesn’t bond to grease.
- Remove the old backsplash if present. If it’s tile, chisel it off and repair the drywall. If it’s just paint, you’re good.
- Protect countertops with rosin paper or a drop cloth. Thinset is miserable to scrape off stone counters.
- Find your starting line. The pro move: find the visual center of the main wall and start there, working outward — this centers the pattern and puts cut tiles at the edges (under cabinets) where they’re least visible. Draw a level horizontal line for your first row.
Setting Tile: The Main Event
- Mix thinset to peanut-butter consistency (or use pre-mixed mastic for small areas — easier, though thinset is stronger). Mix small batches — it skins over in 20-30 minutes.
- Spread thinset on a 2-3 sq ft section with the flat side, then comb with the notched side at 45°. Work in small areas — don’t outrun yourself.
- Set tiles with a slight twist, using spacers. Check level every few tiles — walls are never perfectly flat, and errors compound.
- Cut as you go for edges and outlets. Measure twice, cut once. For outlets: mark the tile, use nippers or the wet saw for notches. The outlet cover plate hides 1/4″ of imperfection — use that margin.
- Let cure 24 hours before grouting. Don’t touch it. Seriously.
Grouting: Where It Comes Together
- Remove spacers. Mix grout to thick peanut butter (or use pre-mixed).
- Float grout diagonally across joints, pressing firmly to fill completely. Work in 3-4 sq ft sections.
- Wait 10-15 minutes (grout starts to haze), then sponge off excess with a damp (not wet) sponge, diagonal strokes, rinsing frequently.
- After 1-2 hours, buff the haze with a dry cloth.
- Caulk (not grout) where tile meets countertop and cabinets — these joints move, and grout cracks. Color-matched sanded caulk looks like grout.
- Seal grout after 72 hours (unless pre-sealed grout). Seal stone tile before grouting.
Common First-Timer Mistakes
- Starting in the corner: puts the pattern off-center and a sliver cut in the most visible spot. Start at center.
- Too much thinset: oozes through joints and is hell to clean. Thin, even layer.
- Rushing the cure: grouting over uncured thinset shifts tiles. Wait the full 24 hours.
- Over-washing grout: too much water weakens grout and causes discoloration. Damp sponge, light pressure.
- Grouting the counter joint: it will crack within months. Caulk it.
- Forgetting outlet box extenders: tile adds thickness; outlets need extenders ($5 for a pack) to sit flush with the new surface. Code requires it.
Cost and Time Reality
- DIY: $200-500 for a typical 25 sq ft backsplash (tile + materials + saw rental). Weekend project: Saturday setting, Sunday grouting.
- Pro: $1,000-2,500 installed. The labor is the cost — which is why DIY makes so much sense here.
A backsplash pairs beautifully with the other cheap kitchen upgrades in my kitchen update guide — together they’re the $1,500 kitchen transformation. And if you’re tiling as part of pre-sale prep, increasing home value covers the strategy.
The Dry Layout Step Everyone Skips
Before you mix a single batch of thinset, do a dry layout: lay your tiles on the counter in the pattern, with spacers, exactly as they’ll go on the wall. This reveals everything — that the pattern doesn’t center the way you imagined, that you’ll end up with a 1/2-inch sliver cut in the most visible spot, that the outlet falls in an awkward place. Adjust now (shift the centerline, change the starting point) when it costs nothing. I skipped this on my first backsplash and spent an hour with the wet saw fixing a layout problem I could have solved in 10 minutes on the countertop. The pros all dry-lay; beginners think it’s wasted time. It’s the opposite.
Learn more: see Tile Council of North America for detailed tutorials and product recommendations.
The Bottom Line
How do I install a backsplash in my kitchen myself? Plan the layout from center-out, prep the wall properly (clean, degreased, power off), set tile in small thinset sections checking level constantly, cure 24 hours, grout diagonally and sponge lightly, caulk the moving joints. $200-500 and a weekend for a transformation that looks professionally done. It’s the ideal first tile project — small, forgiving, and enormously satisfying.