
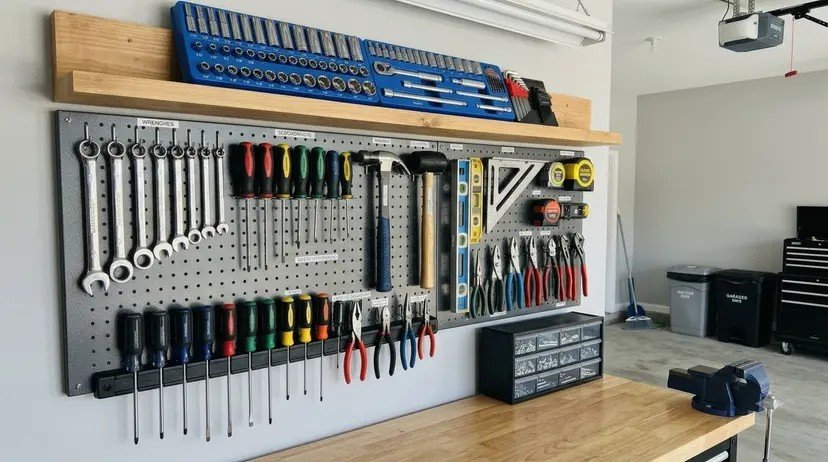
My garage went from “place where tools go to die” to a workshop I actually enjoy in one focused weekend. The question what is the best way to organize a garage workshop isn’t about buying fancy storage systems — it’s about zones, visibility, and the discipline to give everything a home. Here’s the system that works, whether you have a 2-car garage or a single-car corner.
The core principle: organize by workflow, not by category. Don’t put all the “tools” together — put the tools where you use them. The drill lives near the workbench, not in a toolbox across the garage. Think about how you move through a project and arrange accordingly.
What Is the Best Way to Organize a Garage Workshop? Start by Emptying It
Yes, really. Pull everything out onto the driveway. This is the only way to see what you actually have (you’ll find three hammers and no idea how). Then sort ruthlessly:
- Keep (workshop): tools and materials you use for projects
- Keep (garage storage): seasonal items, car supplies — these get the perimeter, not the workshop zone
- Donate/sell: duplicates, broken tools you’ll never fix, “someday” materials from 2019
- Trash: dried paint, dead batteries (recycle properly), mystery chemicals
Be honest about the “someday” pile — if you haven’t touched it in 2 years, it’s not a project, it’s clutter. The EPA’s household hazardous waste guidance covers how to dispose of paints, solvents, and chemicals responsibly — don’t just trash them.
The Zone System
Divide your space into functional zones. Even a small garage fits 4-5:
- Workbench zone: the heart. Sturdy bench (or solid-core door on sawhorses), task lighting, power strip, and the 20% of hand tools you use 80% of the time within arm’s reach. Pegboard above the bench for visibility — if you can’t see it, you won’t use it.
- Power tool zone: miter saw, table saw, etc. on mobile bases ($30-50 each) so they tuck against the wall and roll out for use. Mobile is the secret to a small shop — everything moves.
- Material storage: lumber rack on the wall (vertical or horizontal), sheet goods divider, offcut bin. Lumber stored flat and off the floor stays straight.
- Fastener/hardware zone: small parts organizers (the $20 stackable kind), labeled. Screws, nails, bolts sorted by type and size. This pays for itself the first time you need a specific screw.
- Finishing zone: paints, stains, brushes — ventilated area, away from ignition sources. A small cabinet with doors contains fumes and looks tidy.
Storage That Actually Works
- Pegboard: the workshop classic for a reason. Trace tool outlines with a marker — you’ll instantly see what’s missing. $20 for a 4×8 sheet + hooks.
- French cleats: the upgrade from pegboard. Wall-mounted cleat strips hold custom holders for anything — shelves, tool holders, cabinets. Infinitely reconfigurable. A weekend project that transforms walls.
- Overhead storage: ceiling-mounted racks ($80-150) for seasonal items, camping gear, rarely-used tools. Gets bulky stuff off the floor without eating wall space. Check joist capacity — don’t overload.
- Rolling carts: a 5-drawer rolling tool cabinet ($200-400) is the best workshop purchase most people make. Everything in one mobile unit.
- Clear bins, labeled: for everything else. Clear so you see contents, labeled so others can find things. Uniform bin sizes stack neatly.
- Magnetic strips: for drill bits, wrenches, knives — $10, mounts anywhere, incredibly satisfying.
The Workbench (Deserves Its Own Section)
A good workbench changes everything. Requirements: heavy (it shouldn’t walk when you plane or hammer — 100+ lbs minimum, or bolted to the wall), flat (a warped bench makes everything harder), and at the right height (wrist height standing for general work, ~34-36″ for most people).
Budget option: solid-core door slab ($60-80) on 2×4 legs — flat, heavy, cheap. Upgrade later to a proper bench with a vise ($300-800). Add: bench-mounted power strip, task light (LED shop lights, $30), and a bench vise ($80-150 — the tool you didn’t know you needed).
Power, Light, and Air
- Lighting: garages are chronically under-lit. 5000K LED shop lights ($25-40 each, linkable) — install 2-4x what you think you need. Good light is the cheapest workshop upgrade.
- Power: a 20-amp circuit for power tools (most garages have 15A — an electrician can upgrade for $200-400). Multiple outlets around the space, not one overloaded strip.
- Dust collection: even a $60 shop vac with a dust separator ($30 cyclone lid) transforms air quality. Your lungs will thank you. For heavy woodworking, a 1HP dust collector ($200-300) is the real answer.
- Ventilation: for finishing work, a box fan in the window (exhausting out) + respirator ($30 for a proper half-face with organic vapor cartridges — not a dust mask).
Maintaining the System
Organization decays without maintenance. The rules that keep it working:
- Everything has a home, labeled. If a tool doesn’t have a designated spot, it lives on the workbench forever.
- Clean as you go: 10 minutes at the end of each session. Sweep, put tools back, empty the dust bin. Future you is grateful.
- One in, one out for tools. New drill? The old one goes.
- Annual purge: every spring, one hour — donate the unused, toss the broken, reorganize what’s shifted.
A well-organized workshop makes every other home project faster and more enjoyable — from hanging shelves to drywall repair. The workshop isn’t a luxury; it’s the infrastructure that makes DIY possible.
The Shadow Board Upgrade
Pegboard is good; pegboard with traced tool outlines is transformative. Get a marker and trace every tool in its spot. The psychology is powerful: an empty outline screams “put me back” in a way that a bare hook never does, and you can instantly see what’s missing (or what you lent to a neighbor). It also stops the slow migration where tools drift from their homes over months. I did this on a Saturday morning and my workshop has stayed organized for two years — the outlines create a gentle accountability that no amount of good intentions matched. Take a photo of the finished board; it’s your reset reference when things inevitably drift.
The Bottom Line
What is the best way to organize a garage workshop? Empty it completely, sort ruthlessly, arrange by workflow zones (bench, power tools, materials, fasteners, finishing), maximize wall storage (pegboard/French cleats) and overhead space, invest in lighting and a solid bench, and maintain with clean-as-you-go discipline. One focused weekend and $300-500 in storage turns a chaotic garage into a shop where projects actually get finished.