You paint your nails on Sunday. By Wednesday they’re chipped, and by Friday you wonder why you bothered. For beginners, premature chipping feels like a personal failing — it’s not. Nail polish longevity is about 80% preparation and technique and 20% product. The pros at salons get two-week wear from the same $8 bottle you get three days from, and the difference is entirely in the steps most beginners skip. Here’s the complete beginner’s system for chip-resistant manicures — with Pacific Northwest notes, because the region’s damp climate actually affects polish curing.
Why Polish Chips (The Mechanics)
Chipping happens when the polish film loses adhesion to the nail — at the tip (the highest-impact zone), at the cuticle (lifting from skin contact), or across the nail (shrinkage as polish cures). Beginners typically under-prep the nail plate, apply coats too thick, skip the protective layers, and then subject fresh polish to water and impact before it’s fully cured. Every one of these is fixable.
Step 1: Prep the Nail Plate (The Step Everyone Skips)
This is the 80%. Polish adheres to clean, dry, oil-free nail — not to lotion, cuticle oil, or natural skin oils:
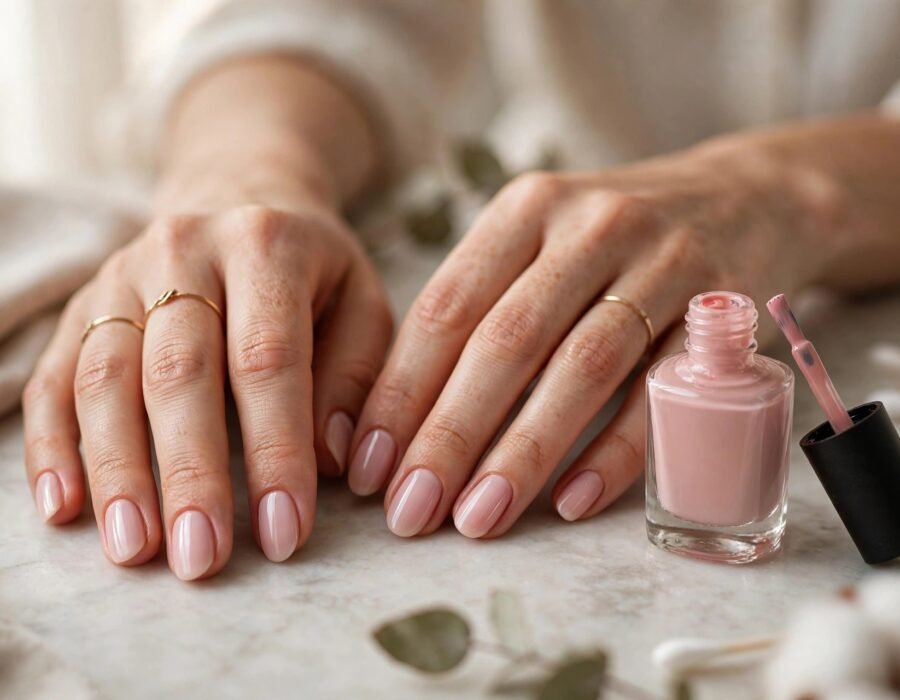
- Shape first. File in one direction (sawing back and forth frays the nail edge, creating microscopic lifting points). A slightly rounded or squoval shape chips less than sharp squares — corners are impact points.
- Push back cuticles (don’t cut them — cuticles protect against infection; the AAD’s nail care guidance is explicit on this). Use a wooden stick or soft pusher after a warm soak.
- Dehydrate the nail. Wipe each nail with rubbing alcohol or a dedicated nail dehydrator on a lint-free pad. You’ll feel the difference — the nail goes from slightly tacky to squeaky. This single step doubles wear time for most beginners.
- Buff lightly. A gentle pass with a fine-grit buffer removes ridges that create air pockets under polish. Don’t over-buff — thinning the nail causes peeling, which causes chipping.
Step 2: Base Coat (Non-Negotiable)
Base coat does three jobs: it bonds polish to the nail (adhesion), prevents staining (especially reds and darks), and fills minor ridges. Apply thin, cap the free edge (run the brush along the tip of the nail — this seals the most chip-prone zone), and let it dry 2 minutes. Beginners who skip base coat get chips starting at day two, guaranteed.
Step 3: Thin Color Coats (Two, Not One Thick One)
The #1 beginner error: one thick gloopy coat. Thick coats skin over on top while staying wet underneath — then shrink, bubble, and peel. The rule: two thin coats, each allowed 2–3 minutes of drying time. Wipe excess polish off the brush (one side of the brush should be nearly clean). Cap the free edge with each coat. The polish should look slightly sheer after coat one — that’s correct; coat two builds the opacity.
Step 4: Top Coat (And Reapply It)
Top coat is the armor. Apply it over the color (capping the edge again), and here’s the pro secret beginners never learn: reapply a thin layer of top coat every 2–3 days. This refreshes the protective film as it wears and is the single biggest factor in pushing a manicure from 5 days to 10+. Keep the bottle where you’ll actually do it.
Step 5: The Curing Window (Where Beginners Lose)
Polish feels dry in 20 minutes but takes up to 24 hours to fully cure (harden through all layers). During the first 12 hours: wear gloves for dishes and cleaning, avoid hot water (heat softens curing polish — shower before painting, not after), don’t pick at anything, and sleep with hands uncovered (sheet marks dent soft polish). The PNW wrinkle: damp, cool air slows curing slightly — give your manicure extra time in winter, and avoid painting nails right before bed in a humid bathroom.
Product Choices That Matter (and Don’t)
- Matters: a good base coat and top coat (these do more for longevity than the color brand), thin-formula polishes (thick old polish chips faster — replace bottles yearly; if it’s gloopy, it’s done).
- Matters somewhat: “long-wear” or “gel-effect” lines genuinely last 1–3 days longer than basic formulas.
- Doesn’t matter much: expensive color brands vs. drugstore for wear time — prep and technique dominate. Save money on color, spend on base/top.
- Consider: peel-off base coats if you change colors often (they sacrifice some longevity for easy removal).
Removal Without Damage
Chips tempt picking — don’t. Picking peels up nail layers, thinning the nail and guaranteeing worse chipping next time. Remove with acetone or non-acetone remover on a soaked cotton pad held on the nail for 30 seconds (dissolving, not scrubbing). Moisturize after — remover is drying.
Gel-Effect Polish vs. Regular: Should Beginners Upgrade?
Once you’ve mastered the basic system, you might eye the “gel-effect” or “long-wear” lines promising 7–10 day wear. Here’s the honest breakdown for beginners. Gel-effect regular polish (no UV lamp needed — brands like Sally Hansen Miracle Gel, Essie Gel Couture): genuinely lasts 2–4 days longer than basic polish with the same application technique, removes with regular remover, and costs only slightly more. This is the best upgrade for most beginners — all the longevity benefit, none of the commitment. True gel polish (UV/LED lamp cured): lasts 2–3 weeks, but requires a lamp ($25–$50), more skill to apply thinly, and careful removal (soaking, not peeling — peeling destroys the nail plate). The removal learning curve is where beginners damage their nails. Dip powder: durable but the application is genuinely difficult for beginners and salon removal is recommended. The recommendation ladder: master regular polish with proper prep first (months 1–3), try gel-effect lines when your technique is solid, and only invest in a lamp system if you’re painting weekly and want the 2-week wear. Whatever you choose, the prep rules don’t change — dehydrated nail plate, thin coats, capped edges, and top-coat refreshes are universal.
Conclusion
Stopping nail polish from chipping as a beginner isn’t about talent or expensive polish — it’s a system: dehydrate the nail plate, base coat, two thin color coats with capped edges, top coat (reapplied every few days), and respect the 24-hour cure. Nail the prep and the thin coats and you’ll double your wear time with the same bottle. Your manicure is part of your overall presentation — finding your personal style and choosing colors that photograph well help you pick shades that work as hard as your technique does.
Frequently Asked Questions
Why does my nail polish chip within days?
Almost always: skipped nail-plate prep (oil blocks adhesion), coats applied too thick, no base/top coat, or water/impact during the 24-hour curing window. Fix the prep and thin coats first.
How many coats of nail polish should I apply?
One thin base coat, two thin color coats, one top coat. Thin is critical — thick coats trap uncured polish underneath, causing shrinkage and peeling.
Does reapplying top coat help prevent chipping?
Yes — it’s the pro secret. A fresh thin top-coat layer every 2–3 days refreshes the protective film and can extend a manicure from 5 days to 10+.
How long does nail polish take to fully dry?
Touch-dry in ~20 minutes, but full cure takes up to 24 hours. Avoid hot water, cleaning chemicals, and impact during the first 12 hours minimum.
Does cold or damp weather affect nail polish?
Yes — cool, humid air (classic PNW winter) slows curing. Give manicures extra drying time, avoid painting right before bed in a steamy bathroom, and keep hands warm while polish sets.
Sources: AAD nail care secrets.